
maax shower door installation instructions pdf
Maax shower door installation instructions provide a comprehensive guide for ensuring proper fit, safety, and functionality. This step-by-step manual helps achieve a professional-like finish effortlessly.
1.1 Overview of Maax Shower Doors
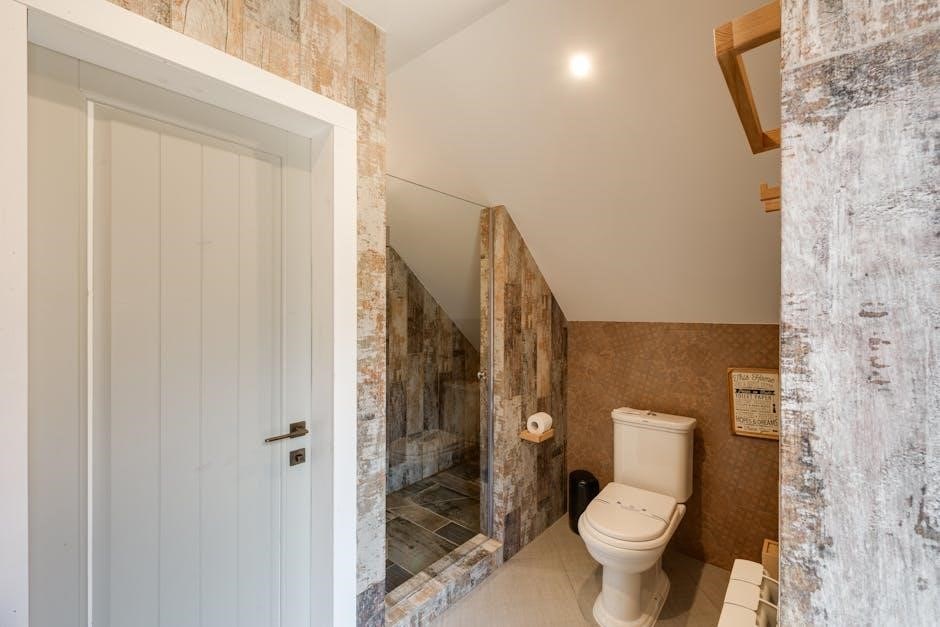
Maax shower doors are known for their durability and elegant design, offering a variety of styles to suit different bathroom aesthetics. Made from high-quality tempered glass and anodized aluminum, these doors are built to last while maintaining a sleek appearance. They come in frameless or framed options, providing flexibility for installation in alcoves or corner setups. Maax shower doors are designed to enhance bathroom functionality, ensuring water tightness and ease of use. Their innovative designs cater to modern preferences, offering a perfect blend of style and practicality for homeowners seeking to elevate their bathroom experience.
1.2 Importance of Proper Installation
Proper installation of Maax shower doors is crucial for ensuring safety, functionality, and longevity. A well-executed installation prevents leaks, door misalignment, and potential damage to the door or surrounding structures. It also guarantees optimal water tightness, minimizing maintenance needs. Correctly following the installation guide ensures the door operates smoothly, enhancing user experience. Additionally, proper installation maintains the aesthetic appeal of the shower enclosure and prevents premature wear of components. It also ensures compliance with warranty conditions, providing peace of mind for homeowners. Investing time in a precise installation guarantees a durable, efficient, and visually appealing shower door system for years to come.

Tools and Materials Needed
Essential tools include a drill, level, measuring tape, and screwdrivers. Materials like masking tape, silicone sealant, and wall fasteners are also required for a secure installation.
2.1 List of Required Tools
The installation requires specific tools to ensure accuracy and safety. These include a drill with bits, a spirit level, measuring tape, screwdrivers (both Phillips and flathead), utility knife, and a pencil. Additionally, silicone sealant, masking tape, and wall fasteners are necessary for proper sealing and mounting. Having these tools ready will streamline the process and prevent delays. Make sure all tools are in good condition to avoid any complications during the installation.
2.2 Materials Provided in the Installation Kit
The Maax shower door installation kit includes essential components for a streamlined process. These materials are pre-assembled and tested for quality. Key items include the threshold, wall jambs, fixed panel, door assembly, hinges, rollers, and seals. All necessary hardware like screws and wall fasteners is also provided. The kit is designed to ensure compatibility and ease of installation, with each part clearly labeled for identification. Additionally, a detailed installation manual is included to guide you through every step. These materials are carefully packaged to prevent damage and ensure a smooth installation experience.
Pre-Installation Preparation
Before starting, measure the shower enclosure and ensure the door and panel fit. Prepare the area by cleaning and marking studs for wall fasteners. Proper preparation ensures a smooth installation process.
3.1 Measuring the Shower Enclosure
Accurately measure the height, width, and depth of the shower enclosure to ensure the door and panel fit properly. Compare these dimensions with the specifications of your Maax shower door and panel. Ensure the threshold is level and measure from the base to the top of the enclosure. Double-check all measurements to avoid installation issues. Proper alignment is crucial for a watertight seal and smooth door operation. Use masking tape to mark studs or installation points on the walls, ensuring accurate placement of hinges and supports. Precise measurements are key to a successful and stress-free installation process.
3.2 Ensuring Compatibility of the Door and Panel
Verify that the Maax shower door and panel are compatible with your enclosure’s dimensions and style. Compare the door’s height, width, and glass type with the enclosure’s measurements. Ensure the door’s hinge placement aligns with the fixed panel for proper movement. Check that the door’s frame style matches the enclosure’s design, whether frameless or framed. Confirm the glass thickness and type (e.g., 3/8″ or 1/2″) match the panel’s specifications. Ensure the door’s sweep or threshold fits the enclosure’s base. Proper compatibility ensures a watertight seal, smooth operation, and a visually appealing installation. Misalignment can lead to leaks or functional issues.
3.3 Preparing the Shower Area
Before starting the installation, clear the shower area of any obstructions and ensure the floor is clean and dry. Protect the floor and surrounding surfaces with masking tape or drop cloths to prevent damage. Ensure access to all sides of the shower enclosure for ease of installation. Double-check that the shower base is level and secure. Verify that the door and panel fit within the enclosure before proceeding. Proper preparation ensures a smooth and efficient installation process, minimizing the risk of errors or damage to components.
Step-by-Step Installation Guide
This guide covers assembling door components, installing the fixed panel, attaching hinges, and securing the door. Follow instructions carefully for proper alignment and a watertight seal.
4.1 Assembling the Door Components
Begin by assembling the door frame, ensuring all parts are securely connected. Attach the hinges to the door panel, aligning them with the side rails. Insert the rollers into the top and bottom tracks, making sure they fit snugly. Gently lift the door and slide it into the assembled frame, verifying proper alignment. Use a rubber mallet to tap components into place if necessary. Double-check that all screws are tightened firmly. Ensure the door moves smoothly and fits securely within the tracks. Proper assembly is crucial for balanced operation and a watertight seal.
4.2 Installing the Fixed Panel
Position the fixed panel within the shower enclosure, ensuring proper alignment with the wall studs. Apply silicone sealant along the edges where the panel meets the walls and base for a watertight seal. Secure the panel using the provided wall brackets, tightening screws firmly. Double-check that the panel is level and plumb. Once installed, ensure the shower door opens and closes without hitting the fixed panel. Proper installation of the fixed panel is essential for structural integrity and ensuring the shower door functions smoothly. Follow the manufacturer’s instructions for exact placement and sealing techniques.
4.3 Attaching the Hinges to the Door
Align the hinges with the top edge of the shower door, ensuring they are evenly spaced and properly positioned. Use the screws provided in the installation kit to secure the hinges to the door frame. Tighten firmly but avoid overtightening, which may damage the glass or frame. Once attached, check that the hinges allow smooth door movement and proper alignment with the fixed panel. Ensure the door hangs level and plumb before proceeding to the next step. Properly secured hinges are crucial for balanced door operation and long-term durability.
4.4 Mounting the Hinges to the Wall
Mark the wall where the hinges will be mounted, ensuring alignment with the shower door. Use a level to guarantee the marks are straight. Apply silicone sealant to the back of the hinge plates for waterproofing. Secure the plates to the wall using the provided screws, ensuring they are tightly fastened. Double-check the alignment with the door hinges to ensure proper fitment. Once mounted, test the door movement by gently swinging it to confirm smooth operation and proper balance. Secure all screws firmly to prevent shifting over time.
4.5 Installing the Door on the Hinges
Align the shower door with the hinges mounted on the wall, ensuring proper positioning. Gently lift the door and insert the hinge pins into the hinge plates. Secure the door using the provided screws or clips, tightening them firmly but avoiding over-tightening. Apply silicone sealant around the hinges for waterproofing. Test the door’s movement by opening and closing it to ensure smooth operation and stability. Double-check all connections for tightness and alignment to prevent future issues like misalignment or leaks. Ensure the door is securely fastened and properly aligned for optimal functionality and durability.
4.6 Securing the Bottom Track
Place the threshold into the door guide, ensuring it is parallel to the shower base. Secure the bottom track by tightening the screws provided in the installation kit. Apply silicone sealant around the edges of the threshold to ensure water tightness. Make sure the track is evenly aligned with the shower enclosure to prevent water leakage. Double-check the alignment and tighten all screws firmly. Allow the sealant to dry completely before testing the door’s movement. This step ensures the door operates smoothly and maintains a waterproof seal at the bottom of the enclosure.
4.7 Adjusting the Door Alignment
After securing the bottom track, check the door’s alignment by gently lifting and tilting it into the roller groove of the top rail. Ensure the door fits snugly within the enclosure. Use the adjustment screws on the hinges to align the door vertically and horizontally. Make sure the door is plumb and level for proper sealing and smooth operation. Apply silicone sealant around any gaps between the door and the fixed panel for added water tightness. Allow the sealant to dry before testing the door’s movement to ensure it glides smoothly and closes securely without any gaps.
Sealing and Waterproofing
Apply silicone sealant between the wall jamb, fixed panel, and door guide to ensure water tightness. This step prevents leaks and maintains the shower enclosure’s integrity.
5.1 Applying Silicone Sealant
Apply silicone sealant between the wall jamb, fixed panel, and door guide to ensure water tightness. Use masking tape to create a clean, straight line for the sealant. Apply a bead of silicone along the edges where the fixed panel meets the wall and base. Wipe away excess sealant with a damp cloth immediately. Allow the sealant to cure completely before using the shower to ensure proper waterproofing and durability. This step is crucial for preventing water leaks and maintaining the integrity of the shower enclosure.
5.2 Ensuring Proper Water Tightness
After applying silicone sealant, inspect all joints and seams for complete coverage. Test water tightness by running water along the edges of the door and fixed panel. Check for leaks around the door guide, hinges, and wall connections. Address any gaps by reapplying sealant as needed. Regularly inspect the sealant for wear or degradation over time. Proper water tightness ensures long-lasting performance and prevents damage to surrounding areas. This step is essential for maintaining the shower enclosure’s durability and functionality.
Post-Installation Checks
Test door alignment, movement, and water tightness. Inspect all components for leaks and proper functionality. Ensure the shower enclosure operates smoothly and meets safety standards.
6.1 Testing Door Movement and Alignment
After installation, ensure the door opens and closes smoothly. Check alignment with the fixed panel and track for proper fit. Verify that the door glides effortlessly without catching or binding. Inspect the rollers and hinges for correct function and stability. Test the door’s ability to seal tightly when closed to prevent water leakage. Adjustments may be necessary to achieve optimal performance and alignment. Ensure all components are secure and functioning as intended for safe and efficient use of the shower enclosure.
6.2 Inspecting for Leaks
Inspect the shower enclosure for leaks by running water over the door and panels. Check all seams, joints, and sealant applications for any signs of water penetration. Ensure the silicone sealant around the door guide, fixed panel, and wall connections is intact and free from gaps. Verify proper alignment of the door and panel to maintain water tightness. Address any leaks promptly to prevent water damage. Regular inspections help maintain the enclosure’s integrity and performance, ensuring a safe and functional shower environment.

Maintenance and Care
Regular maintenance ensures longevity and functionality. Clean the door and anodized aluminum parts with mild detergent. Inspect seals and hinges periodically to maintain water tightness and smooth operation.
7.1 Cleaning the Shower Door
Regular cleaning maintains the shower door’s appearance and functionality. Use a mild detergent diluted in water to wipe down the door and frames. Avoid abrasive materials or harsh chemicals, as they may damage surfaces. For glass panels, a mixture of water and white vinegar or glass cleaner works effectively. After cleaning, dry the door with a lint-free cloth or squeegee to prevent water spots. Clean the door and tracks regularly to remove soap scum and mineral deposits, ensuring smooth operation. This routine maintenance keeps your Maax shower door looking new and functioning properly for years.
7.2 Maintaining the Anodized Aluminum Parts
Maintain the anodized aluminum parts by cleaning them with a mild detergent solution. Avoid using abrasive materials or harsh chemicals, as they can damage the finish. Regularly inspect for signs of wear or corrosion. Dry the parts thoroughly after cleaning to prevent water spots. For stubborn stains, mix baking soda with water to create a gentle paste, apply it, and rinse. This ensures the aluminum retains its shine and durability. Regular maintenance prevents tarnishing and extends the lifespan of your Maax shower door components.
7.3 Regular Inspection Schedule
Regular inspections are crucial to maintain your Maax shower door’s performance and longevity. Check the door alignment and hinges monthly to ensure smooth operation. Every three months, inspect the silicone sealant for cracks or gaps and reapply if necessary. Clean the anodized aluminum parts with a mild detergent to prevent corrosion. Annually, examine the wall studs and door panel fit to ensure stability. Address any issues promptly to prevent leaks or damage. This routine will help maintain water tightness, functionality, and the overall appearance of your shower enclosure, ensuring it remains in excellent condition for years to come.

Troubleshooting Common Issues
Common issues like door misalignment, leaks, or difficult movement can often be resolved with quick fixes. Adjust hinges, check seals for gaps, and clean tracks regularly. Consult the manual or contact Maax support for persistent problems to ensure optimal performance and longevity.
8.1 Door Misalignment
Door misalignment is a common issue that can affect the functionality of your Maax shower door. It often occurs due to improper installation or loose hinges. To fix this, check the alignment screws on the hinges and tighten them if necessary. Ensure the door is level and properly aligned with the fixed panel. If the door sags or doesn’t close evenly, adjust the hinge positions or replace worn-out components. Regular cleaning of the tracks and rollers can also prevent misalignment. For persistent issues, consult the installation manual or contact Maax customer support for assistance.
8.2 Leaks Around the Door or Panel
Leaks around the door or panel are typically caused by improper sealing or gaps in the installation. Inspect the silicone sealant around the door and panel edges; If gaps are found, reapply silicone sealant to ensure a watertight seal. Check the alignment of the door and panel to confirm they fit snugly together. If leaks persist, verify that all hinges and mounting points are secure and properly aligned. Additionally, ensure the bottom track is correctly installed and free from debris. Regular maintenance and inspections can help prevent leaks and maintain the integrity of your Maax shower enclosure.
8.3 Difficulty in Door Movement
Difficulty in door movement may arise due to misalignment or improper installation of hinges. Check if the door is evenly spaced and aligned with the fixed panel. Ensure hinges are securely fastened to both the door and the wall. Clean the bottom track of debris, as obstructions can hinder smooth movement. Apply a small amount of silicone-based lubricant to the hinge pins if they appear stiff. If issues persist, verify that the door and panel are properly sized for the enclosure. Adjustments may be needed to ensure smooth operation and maintain the door’s functionality over time.
Warranty and Support
Maax offers a 10-year residential warranty covering parts and labor. For support, visit the Maax website or contact their customer service team directly.
9.1 Understanding the Maax Warranty
Maax shower doors come with a comprehensive 10-year residential warranty, covering defects in materials and workmanship. The warranty ensures parts and labor are covered for a decade, providing peace of mind. Proper installation, as outlined in the manual, is required for warranty validity. The warranty does not cover damage from misuse, improper maintenance, or normal wear and tear. For claims, homeowners must provide proof of purchase and contact Maax customer support. This warranty underscores Maax’s commitment to quality and customer satisfaction, ensuring durable performance for years to come.
9.2 Contacting Maax Customer Support
Maax customer support is readily available to assist with installation inquiries, warranty claims, or product-related questions. Customers can contact Maax via phone, email, or through the official website. The website also provides access to live chat, FAQs, and downloadable resources like installation manuals. For immediate assistance, calling the dedicated customer service number is recommended. Additionally, support is available in multiple languages, ensuring accessibility for all users. Representatives are trained to address concerns efficiently, helping customers resolve issues promptly. Reaching out to Maax support ensures troubleshooting and warranty claims are handled smoothly, maintaining customer satisfaction and product performance.
Maax shower door installation instructions ensure a successful, professional-grade setup. Proper installation guarantees functionality, safety, and aesthetic appeal, enhancing your bathroom experience for years to come.
10.1 Final Tips for a Successful Installation
Ensure all measurements are double-checked before starting. Use silicone sealant generously to prevent leaks. Follow the installation sequence carefully for optimal results. Regularly clean and dry the door to maintain its appearance. Test door movement and alignment post-installation. Inspect for any gaps or leaks to ensure water tightness. Schedule routine maintenance to keep the door functioning smoothly. By adhering to these tips, you’ll enjoy a durable, stylish, and leak-free Maax shower door installation for years to come.
10.2 Encouragement to Follow the Guide
By following the Maax shower door installation guide, you ensure a professional finish and long-term durability. Proper installation prevents leaks, aligns doors smoothly, and enhances safety. The comprehensive manual covers every step, from preparation to final checks. Adhering to these instructions guarantees a secure, watertight fit and minimizes future maintenance. Maax’s detailed guide empowers you to achieve a flawless installation, even if you’re not a professional. Trust the expertise behind Maax products and enjoy a stylish, functional shower door for years to come.