
sears battery charger manual
Welcome to the Sears Battery Charger Manual, your essential guide to understanding and using Sears battery chargers safely and effectively. This manual covers key features, safety tips, and step-by-step instructions for optimal performance. Whether you’re charging car batteries or maintaining marine batteries, this guide ensures you get the most out of your Sears charger while prioritizing safety and efficiency. Familiarize yourself with the models, settings, and best practices to maximize your charging experience.
1.1 Overview of Sears Battery Chargers
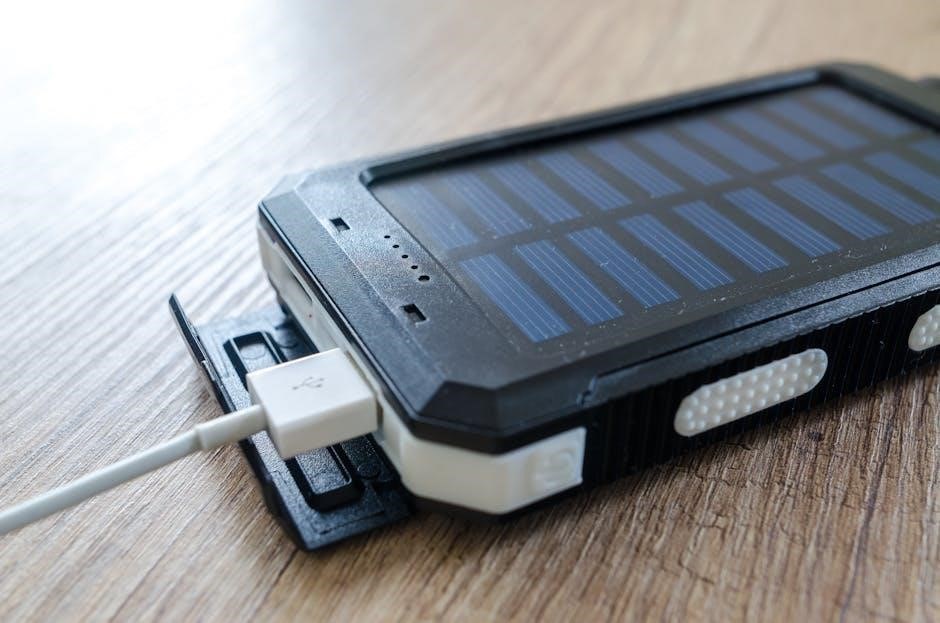
Sears battery chargers are reliable tools designed for various automotive and marine applications. They offer models like the 4 Amp 6/12 Volt Manual Charger (Model 2871836) and the 10/2 Amp Charger, providing flexibility for different needs. These chargers support AGM, GEL, and deep-cycle batteries, ensuring compatibility and versatility. With features like automatic shut-off and overcharge protection, Sears chargers prioritize safety and efficiency. Whether for cars, trucks, or boats, Sears chargers deliver consistent performance, making them a trusted choice for users seeking durable and efficient charging solutions.
1.2 Importance of Reading the Manual
Reading the Sears Battery Charger Manual is crucial for safe and effective use. It provides essential safety precautions, operational guidelines, and troubleshooting tips. Understanding the charger’s features, such as automatic shut-off and overcharge protection, ensures optimal performance. The manual also covers warranty details and maintenance schedules, helping you avoid voiding the warranty or causing damage. By following the instructions, you can extend the life of your charger and batteries while ensuring reliable charging for cars, trucks, and marine applications. Always refer to the manual before first use to guarantee a safe and efficient experience.
Key Features of Sears Battery Chargers
Sears battery chargers offer advanced features like automatic shut-off, multi-stage charging, and overcharge protection. They are compatible with various battery types, ensuring efficient and safe charging for cars, trucks, and marine applications.
2.1 Models and Specifications
Sears offers a range of battery charger models, each designed for specific needs. The Sears 4 Amp 6/12 Volt Manual Charger (Model 2871836) is a popular choice for standard vehicles. Other models, like the 10/2 Amp Charger, provide dual charging rates for versatility. The Sears 200.71206 model features automatic shut-off, while the 608.718571 model includes a built-in battery tester. These chargers are compatible with AGM, GEL, and deep-cycle batteries, offering amperage options from 2 to 10 amps. Always refer to your model’s manual for exact specifications and features.
2.2 Voltage and Amperage Options
Sears battery chargers are designed with flexible voltage and amperage settings to suit various battery needs. Common models offer 6V and 12V charge options, making them suitable for car, truck, and marine batteries. Amperage ranges from 2 to 10 amps allow users to choose between faster charging or gentler, overnight charging. Higher-end models, like the 10/2 Amp Charger, provide dual charging rates for versatility. Always match the charger’s settings to your battery’s specifications for optimal performance and safety.
2.3 Compatibility with Different Battery Types
Sears battery chargers are versatile and compatible with various battery types, including standard lead-acid, AGM (Absorbent Glass Mat), and GEL batteries. Models like the Sears 200.71211 and 200.71206 support 12V batteries with capacities ranging from 2-20Ah, ensuring reliable charging for automotive, marine, and deep-cycle applications. The chargers are also suitable for maintenance and trickle charging, making them ideal for both everyday use and long-term battery care. Always refer to your specific model’s manual to confirm compatibility and settings for your battery type.

Safety Precautions and Guidelines
Always read the manual and follow safety guidelines. Avoid incorrect connections and sparks. Use appropriate extension cords and ensure proper ventilation. Prioritize safety to prevent accidents and ensure reliable charging.
3.1 General Safety Rules
Safety is paramount when using a Sears battery charger. Always read and follow the manual instructions carefully. Ensure the charger is placed on a stable, heat-resistant surface away from flammable materials. Avoid overcharging, as it can damage the battery and pose a fire risk. Keep the area well-ventilated to prevent hydrogen gas buildup. Never touch electrical components with wet hands or while standing in water. Use the correct cable sizes and avoid damaged cords to prevent electrical hazards. Keep children and pets away from the charging area. Properly connect the battery terminals, ensuring the positive cable is attached to the positive terminal and the negative to the negative. Be cautious of sparks during connections. If unsure about any step, consult a professional. Regularly inspect the charger and battery for signs of wear or damage. Always unplug the charger when not in use. Following these guidelines ensures safe and effective charging, protecting both the user and the equipment. Remember, safety precautions are non-negotiable to prevent accidents and extend the lifespan of your Sears battery charger.
3.2 Proper Handling and Storage
Proper handling and storage of your Sears battery charger are crucial for maintaining its performance and longevity. Always handle the charger and battery with care to avoid physical damage. Store the charger in a cool, dry, well-ventilated area, away from flammable materials and direct sunlight. Keep the charger and cables clean, using a soft cloth to wipe away dust or dirt. Avoid exposing the charger to extreme temperatures or moisture. When not in use, store the battery in a dry place, disconnected from the charger. Regularly inspect the charger and cables for signs of wear or damage. Proper storage and handling ensure safety and extend the life of your Sears battery charger, preventing potential hazards and maintaining reliability.
3.3 Warning Signs and Emergency Procedures
Be aware of warning signs such as overheating, unusual odors, or sparks, which indicate potential issues with the charger or battery. In case of an emergency, immediately disconnect the charger from the power source and the battery. Ventilate the area to prevent inhalation of fumes. Never use water to extinguish a battery fire, as it can worsen the situation. If the charger or battery is damaged, stop use and contact a professional. Always prioritize safety and follow emergency procedures to prevent accidents and ensure proper handling of the Sears battery charger.

Electrical Requirements and Setup
Ensure the charger is plugged into a grounded outlet matching its voltage requirements. Avoid using damaged cords or overloaded circuits. Always prepare the battery as instructed.
4.1 Power Supply and Plug-In Instructions
Connect the Sears battery charger to a grounded electrical outlet matching its voltage requirements. Ensure the outlet is not overloaded and avoid using damaged cords. Plug in the charger only after ensuring the battery is properly prepared and compatible with the charger’s voltage settings. Always follow the manufacturer’s guidelines for correct connections to prevent electrical hazards. Verify the battery’s voltage before plugging in the charger to ensure compatibility. Refer to the manual for specific power supply requirements for your model.
4.2 Extension Cord Usage Guidelines
Avoid using an extension cord if possible. If necessary, use a heavy-duty cord with a minimum wire size of 16 AWG or heavier. Ensure the cord is rated for outdoor use if applicable. Do not exceed 25 feet in length to maintain safe power delivery. Never overload the cord or outlet, as this can cause overheating or electrical hazards. Always inspect the cord for damage before use and replace it if worn or frayed. Properly secure connections to prevent accidental disconnections during charging.
4.3 Preparing the Battery for Charging
Before charging, ensure the battery terminals are clean and free of corrosion. Use a wire brush to remove any rust or debris. Check the electrolyte level in flooded batteries and top it off with distilled water if necessary. Make sure the battery is at room temperature, as extreme temperatures can affect charging efficiency. Disconnect the negative terminal first to prevent any accidental short circuits. Always wear protective gloves and eyewear when handling batteries. Ensure the battery is placed on a stable, non-conductive surface away from flammable materials.

Step-by-Step Charging Instructions
This section offers a step-by-step guide for safely and effectively charging your battery with the Sears Battery Charger. Follow these instructions for optimal results and battery longevity.
5.1 Connecting the Battery to the Charger
To connect the battery to the Sears charger, ensure the charger is turned off. Attach the positive (red) clamp to the battery’s positive terminal and the negative (black) clamp to the negative terminal or a grounded metal surface. Ensure terminals are clean and secure to avoid sparks. For models like the Sears 10/2 Amp charger, follow the polarity guidelines strictly. If unsure, consult the manual for specific instructions. Always prioritize safety to prevent short circuits or damage. Proper connections are vital for efficient charging.
5.2 Setting the Voltage and Amperage
Before charging, set the voltage and amperage according to the battery type. Refer to the manual for guidelines, as models like the Sears 10/2 Amp charger may vary. Ensure the voltage matches the battery’s rating (6V or 12V). For amperage, select a lower setting for smaller batteries or maintenance charging, and higher for faster charging. Always check the battery’s specifications to avoid overcharging. Proper settings ensure safety, efficiency, and extend battery life. Adjust carefully to match your needs and the charger’s capabilities.
5.3 Monitoring the Charging Process
Monitor the charging process closely to ensure safety and efficiency. Check the charger’s indicator lights or LCD display for status updates. Ensure the environment is well-ventilated to prevent hydrogen buildup. Avoid overheating by keeping the charger away from direct sunlight or flammable materials. Periodically inspect the battery terminals for secure connections and signs of damage. Refer to the manual for specific guidelines, such as those for the Sears 10/2 Amp charger. Stop charging immediately if unusual odors or sounds occur. Always follow the manufacturer’s recommendations for your model.

Maintenance and Troubleshooting
Regularly clean the charger to prevent dust buildup and ensure optimal performance. Inspect for damage and address common issues promptly. Resetting the charger may resolve minor problems;
6.1 Cleaning and Inspecting the Charger
Regular cleaning and inspection are crucial for maintaining your Sears battery charger’s efficiency and safety. Use a soft, dry cloth to wipe down the charger, removing dirt or dust that may interfere with its operation. Avoid using liquids or harsh chemicals, as they can damage the unit. Inspect the charger for any visible damage, such as frayed cords or broken components. Check the terminals for corrosion and clean them with a wire brush if necessary. Ensure all connections are secure and functioning properly. Refer to the manual for specific cleaning instructions tailored to your model.
6.2 Common Issues and Solutions
Common issues with Sears battery chargers include the charger not turning on, error lights flashing, or slow charging. If the charger doesn’t power on, check the power source and ensure the cord is securely plugged in. For error lights, consult the manual to interpret the codes and address the specific issue. Slow charging may indicate a weak battery or incorrect settings. Clean corroded terminals with a wire brush and ensure proper connections. If problems persist, reset the charger or contact Sears customer support for assistance. Always refer to the troubleshooting guide for model-specific solutions.
6.3 Resetting the Charger (If Applicable)
To reset your Sears battery charger, first disconnect the battery and unplug the charger from the power source. Allow it to remain unplugged for 10-15 minutes to fully discharge any residual power. Reconnect the charger to the power supply and ensure all cables are securely attached. If your model has a reset button, press and hold it for 5-10 seconds until the indicator lights reset. If issues persist, refer to your manual for model-specific reset instructions or contact Sears customer support for further assistance. This process helps restore default settings and resolve minor malfunctions.

Warranty Information and Support
Your Sears battery charger is backed by a comprehensive warranty, ensuring protection against defects in materials and workmanship. For detailed warranty coverage, visit the Sears website or refer to the provided manual. Additionally, Sears offers dedicated customer support for troubleshooting, repairs, and general inquiries. Online resources, including FAQs and downloadable manuals, are available to assist with any issues you may encounter while using your battery charger.
7.1 Understanding the Warranty Coverage
Your Sears battery charger is protected by a limited warranty that covers defects in materials and workmanship for a specified period. The warranty typically includes repairs or replacements at no additional cost; Coverage varies by model and is outlined in the provided manual. Warranty claims require proof of purchase and may not cover damage caused by misuse or normal wear and tear. For detailed terms and conditions, refer to the warranty section in your manual or visit the Sears website for clarification.
7.2 Contacting Sears Customer Service
For assistance with your Sears battery charger, contact customer service via phone, email, or through the official Sears website. Representatives are available to address questions, concerns, and warranty inquiries. Be prepared to provide your product model number and purchase details for efficient support. Visit the Sears website for contact information and additional resources. Customer service is available to help resolve issues and ensure your charger operates effectively. Reach out for troubleshooting, warranty claims, or general inquiries.
7.3 Online Resources and Manuals
For convenient access to Sears battery charger manuals and additional resources, visit the official Sears website or authorized online portals. Download PDF versions of user manuals for various models, ensuring you have the latest instructions and guidelines. These resources also include troubleshooting tips, compatibility charts, and FAQs to help resolve common issues. Utilize online forums and support pages for further assistance, ensuring optimal use and maintenance of your Sears battery charger. These resources are designed to enhance your user experience and provide comprehensive support.
Advanced Features and Settings
Explore advanced features like automatic shut-off, multi-stage charging, and overcharge protection to optimize performance and extend battery life. These settings ensure efficient and safe charging processes.
8.1 Automatic Shut-Off Function
The automatic shut-off function is a critical feature that prevents overcharging by turning off the charger once the battery reaches full capacity. This feature not only ensures battery longevity but also enhances safety by minimizing the risk of overheating or damage. It is especially useful for users who may forget to monitor the charging process. By automating the shut-off, Sears battery chargers provide a convenient and reliable charging experience, protecting both the battery and the charger from potential harm. This function is a key component in maintaining optimal battery health and performance over time.
8.2 Multi-Stage Charging Process
The multi-stage charging process is designed to optimize battery performance by adjusting the charging current and voltage through different phases. This advanced feature ensures that batteries are charged efficiently without overcharging. The process typically includes bulk charging, absorption, and maintenance stages, each tailored to specific battery needs. This method is particularly effective for AGM and GEL batteries, as it prevents overcharging and extends battery life. The charger automatically adjusts its output to match the battery’s state, ensuring a safe and complete charge every time. This feature enhances overall battery health and longevity.
8.3 Overcharge Protection Systems
The Sears battery charger features advanced overcharge protection systems to prevent battery damage. These systems monitor voltage and current levels, automatically shutting off the charger when the battery reaches full capacity. This prevents overheating, extending battery life and reducing the risk of premature degradation. Overcharge protection is especially crucial for sensitive battery types like AGM and GEL, ensuring safe and reliable charging. By integrating this feature, Sears chargers provide peace of mind and protect your investment in high-quality batteries. This technology is essential for maintaining optimal battery health and performance over time.
Environmental and Disposal Considerations
Always follow eco-friendly practices when charging and disposing of batteries. Properly recycle old batteries to prevent environmental harm and promote sustainable energy use. Sears supports green initiatives.
9.1 Eco-Friendly Charging Practices
Adopt eco-friendly charging practices to minimize environmental impact. Use energy-efficient Sears chargers with automatic shut-off to reduce power consumption. Always recycle old batteries responsibly and avoid improper disposal. Choose chargers compatible with renewable energy sources when possible. Sears promotes sustainable practices, ensuring their products align with environmental standards. Properly store batteries to prevent leakage and contamination. By following these guidelines, you contribute to a greener future while maintaining optimal charging performance. Sears supports eco-conscious users in their efforts to reduce ecological footprints.
9.2 Proper Disposal of Batteries
Properly dispose of batteries to prevent environmental contamination. Do not discard batteries in regular trash, as they contain hazardous materials. Check local guidelines for designated recycling centers or collection events. Neutralize battery terminals by covering them with electrical tape to prevent accidental short circuits. Participating retailers or service centers may accept batteries for safe disposal. Never crush or incinerate batteries, as this releases toxic substances. Sears emphasizes responsible disposal practices to protect the environment and public health. Always follow local regulations for eco-friendly battery disposal.
9.3 Recycling Opportunities
Recycling batteries is a crucial step in reducing waste and conserving resources. Many retailers and service centers offer battery recycling programs, accepting various types of batteries. Sears encourages users to participate in these initiatives to promote sustainability. Check local guidelines or partner organizations for nearby recycling facilities. Properly sorted and prepared batteries ensure safe processing. Recycling helps recover valuable materials and prevents hazardous substances from entering landfills. Sears supports eco-friendly practices and recommends exploring community recycling events or drop-off locations for responsible battery disposal. This ensures a cleaner environment for future generations. Always verify recycling requirements before submitting batteries.
Frequently Asked Questions (FAQs)
- How long does it take to charge a battery? Charging time varies by battery type and capacity, typically ranging from 2 to 12 hours.
- Is the charger compatible with my vehicle? Check the manual for compatible battery types and ensure the charger matches your battery’s voltage and amperage requirements.
- What if the charger doesn’t turn on? Verify power connections, check for blown fuses, and ensure the battery is properly connected.
10.1 Common User Queries
Users often ask about charging times, compatibility, and troubleshooting. For instance, “How long does it take to charge a 12V battery?” or “Is this charger compatible with my car?” Others inquire about specific models, like the Sears 10/2 Amp charger or the DieHard battery charger. Common issues include the charger not turning on, which may relate to power supply or battery connections. Many seek clarification on automatic shut-off features and overcharge protection. These queries highlight the need for clear guidelines and troubleshooting steps to ensure safe and effective use of Sears battery chargers.
10.2 Charger Compatibility with Other Brands
Sears battery chargers are designed to work with various battery types, including those from other brands, as long as voltage and amperage settings align. Users often ask if Sears chargers can charge batteries from brands like DieHard or others. Generally, compatibility depends on the battery’s voltage (e.g., 12V) and the charger’s adjustable settings. For example, the Sears 10/2 Amp charger can charge 12V batteries from other brands if properly configured. Always check the battery’s specifications and charger settings to ensure safe and effective charging.
10.3 Time Required for Full Charge
The time required to fully charge a battery depends on its capacity and the charger’s amperage setting. Sears chargers, such as the 2 Amp or 4 Amp models, typically take 8-12 hours for a standard 12V car battery. Higher amperage settings, like 10 Amp, can reduce charging time to 4-6 hours. Always refer to the manual for specific guidelines, as charging times vary based on battery size and type. Proper monitoring ensures a safe and efficient charging process, preventing overcharging and extending battery life.
Properly using your Sears battery charger ensures safety and efficiency. Always follow guidelines, monitor charging, and store batteries correctly for longevity. Prioritize safety and efficiency in every use.
11.1 Best Practices for Longevity
To extend the life of your Sears battery charger and batteries, follow best practices. Regularly clean the charger and ensure proper ventilation. Store batteries in a cool, dry place and avoid overcharging. Always refer to the manual for specific guidelines. Monitor charge levels and avoid deep discharges. Use the correct voltage and amperage settings for your battery type. Inspect cables and connections for damage before use. By adhering to these practices, you’ll ensure optimal performance and longevity for both your charger and batteries.
11.2 Regular Maintenance Schedule
Regular maintenance ensures your Sears battery charger performs optimally. Clean the charger and cables monthly to prevent dust buildup. Inspect connections for corrosion and tighten loose terminals. Store batteries in a cool, dry place during off-seasons. Check the charger’s power cord for damage and replace if worn. Schedule annual checks for proper voltage output and amperage settings. Refer to the manual for specific maintenance tasks tailored to your model. Consistency in upkeep will extend the lifespan of both the charger and batteries.
11.3 Staying Updated with Manufacturer Guidelines
Regularly check for updates from Sears to ensure your battery charger operates at its best. Visit the official Sears website or contact customer support for the latest guidelines and software updates. Staying informed about new features, safety protocols, and maintenance tips can enhance performance and safety. Subscribe to newsletters or follow official social media channels for timely notifications. Updated guidelines may include improved charging algorithms, compatibility with new battery types, or enhanced safety measures. Always refer to the latest manual for the most current instructions and best practices.