
tulip tie dye instructions pdf
Welcome to the world of vibrant colors with Tulip Tie-Dye! This guide provides step-by-step instructions for achieving professional results․ Follow the simple process‚ let the dye set‚ and enjoy your unique creations!
Overview of Tulip Tie-Dye Kits
Tulip Tie-Dye Kits are popular for their ease of use and vibrant color results․ Available in various sizes‚ including 3-color‚ 5-color‚ and 18-color options‚ these kits cater to both beginners and experienced crafters․ Each kit includes pre-measured dye powders‚ squeeze bottles‚ and gloves‚ making the process convenient․ Designed for versatility‚ Tulip kits allow for simple or complex designs‚ ensuring creativity and professional-looking results when instructions are followed․ Perfect for DIY projects‚ they offer a fun and accessible way to achieve unique tie-dye patterns․
Importance of Following Instructions for Best Results
Adhering to the instructions in the Tulip Tie-Dye guide is crucial for achieving vibrant‚ long-lasting colors․ Properly mixing dye‚ setting times‚ and rinsing techniques ensure optimal results․ Deviating from guidelines can lead to faded or uneven colors․ Following each step carefully enhances color intensity and prevents washout‚ guaranteeing professional-looking tie-dye creations․ Consistency in preparation and application is key to unlocking the full potential of Tulip kits and enjoying durable‚ washable designs․
Materials Needed for Tulip Tie-Dye
Gather your Tulip Tie-Dye kit‚ which includes dye powder‚ squeeze bottles‚ gloves‚ and rubber bands․ Additional supplies like protective gear and fabric are also essential for success․
Components of Tulip Tie-Dye Kits
Tulip Tie-Dye kits are all-inclusive‚ offering vibrant dye powders‚ squeeze bottles‚ gloves‚ and rubber bands․ These kits cater to various skill levels‚ from basic 3-color sets to advanced 12-color packs․ Each kit is designed to simplify the tie-dye process‚ ensuring creative freedom while providing professional results․ Follow the included instructions for optimal color intensity and lasting vibrancy‚ making every project a success․
Additional Supplies Required for the Process
While Tulip kits are comprehensive‚ a few extra supplies enhance the experience․ Protective gear like gloves and aprons prevent skin and clothing stains․ Rubber bands or zip ties help create unique patterns․ Plastic wrap or trash bags can separate fabric layers to avoid dye seepage․ A well-ventilated workspace and paper or cardboard for covering surfaces are also recommended․ These additions ensure a smooth‚ enjoyable tie-dye process with professional results every time․
Preparation Steps for Tie-Dye
Pre-wash fabric to remove finishes‚ ensuring better dye absorption․ Protect workspaces with paper or cardboard․ Use rubber bands to create resistance areas for unique designs․
Washing and Preparing the Fabric
Before starting your tie-dye project‚ wash and dry the fabric to remove any finishes that might interfere with dye absorption․ This step ensures vibrant colors and lasting results․ Gently hand-wash or machine-wash using mild detergent․ Do not use fabric softeners․ Allow the fabric to air-dry completely or tumble-dry on a low setting․ Proper preparation is key to achieving the best possible outcome with Tulip Tie-Dye products․ Follow these steps diligently for professional-looking results․
Choosing the Right Fabric for Tie-Dye
For the best tie-dye results‚ choose natural fabrics like cotton‚ linen‚ or rayon‚ as they absorb dye effectively․ Avoid synthetic fabrics such as polyester or nylon‚ as they may not hold the color well․ Opt for light-colored‚ 100% cotton fabrics for vibrant outcomes․ Ensure the fabric is clean and free of finishes or softeners․ Pre-wash the fabric before dyeing to achieve optimal color intensity․ Selecting the appropriate material is crucial for a successful tie-dye project with Tulip Tie-Dye kits․
Protecting Your Workspace
Protecting your workspace is essential to avoid stains and damage․ Cover your work surface with plastic‚ newspaper‚ or a disposable tablecloth․ Wear old‚ protective clothing‚ including gloves and goggles․ Use paper or cardboard to shield surfaces from dye seepage․ Ensure skin and surfaces are protected to prevent permanent stains․ Following these precautions will help you enjoy a mess-free tie-dye experience with Tulip Tie-Dye kits․ Proper preparation ensures a safe and enjoyable creative process for everyone involved․

Folding Techniques for Unique Designs
Discover the art of folding techniques to create unique tie-dye patterns․ From crumple to spiral and shibori‚ these methods ensure vibrant‚ one-of-a-kind designs with Tulip Tie-Dye kits․
Basic Folding Methods for Tie-Dye
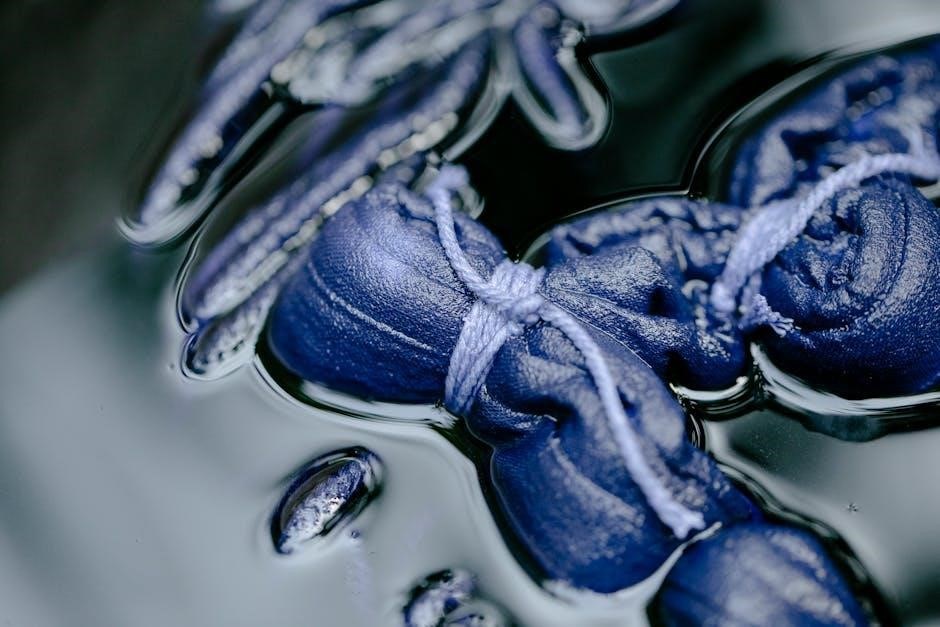
Start with simple folds like the crumple‚ spiral‚ or accordion methods․ Secure with rubber bands to create unique resistance areas for the dye․ For a classic look‚ try the bunching technique‚ folding fabric into sections and binding tightly․ Experiment with basic folds to achieve distinctive patterns․ Apply dye evenly‚ ensuring vibrant colors․ Follow kit instructions for optimal results․ Let the folded fabric sit for 6-8 hours to allow the dye to set deeply․
Advanced Folding Techniques for Complex Patterns
Elevate your tie-dye game with advanced folding techniques like the accordion fold or shibori pleating․ For intricate designs‚ fold fabric into multiple layers‚ securing with rubber bands to create unique resistance patterns․ Try the double spiral or folding and twisting methods for bold‚ multi-dimensional effects․ Layer colors strategically for vibrant‚ overlapping hues․ Let the dye set longer for deeper saturation․ Experiment with these techniques to achieve stunning‚ one-of-a-kind designs that showcase your creativity․
Applying the Dye
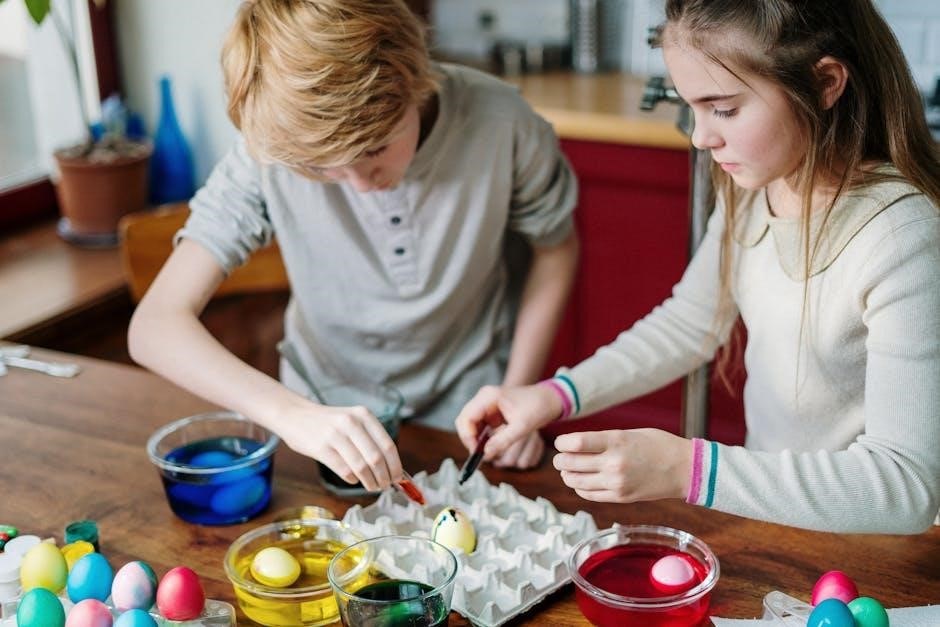
Mix Tulip dye in squeeze bottles with water‚ shake well‚ and apply evenly․ For vibrant colors‚ let the dye set 6-8 hours before rinsing․ Follow kit instructions․
Mixing the Dye According to Instructions
Start by mixing Tulip One-Step Tie-Dye according to the kit instructions․ Fill the provided squeeze bottles with water‚ add the dye powder‚ and shake thoroughly․ Ensure the mixture is uniform for consistent color․ For multi-tone effects‚ layer colors carefully․ Always follow the recommended ratio of dye to water to achieve vibrant results․ Let the dye set for 6-8 hours or longer for intense colors․ This step is crucial for ensuring the dye adheres properly to the fabric․
Applying Dye to Fabric for Different Effects
Apply Tulip One-Step Tie-Dye by squeezing the mixed dye onto the folded fabric․ For unique patterns‚ layer colors or use a single shade․ Gently saturate the fabric without over-saturating․ To achieve multi-tone effects‚ apply colors in layers‚ allowing each to set slightly before adding the next․ Use the squeeze bottles to target specific areas for precise results․ Let the dye set for 6-8 hours or longer for the most vibrant outcome․ Always follow the instructions for optimal color intensity and durability․
Layering Colors for Multi-Tone Designs
Layering colors creates stunning multi-tone effects in Tulip Tie-Dye․ Apply the first color‚ let it set for a few minutes‚ then add another shade on top․ Use the squeeze bottles to precisely target areas for layered hues․ Avoid over-saturating the fabric to prevent colors from muddying․ Allow each layer to set slightly before adding the next for crisp‚ vibrant results․ This technique ensures bold‚ multi-dimensional designs that stand out․ Follow the instructions for optimal color intensity and durability․
Setting and Rinsing the Dye
Let the dye set for 6-8 hours for intense colors․ Rinse thoroughly with water until excess dye is removed‚ then cut rubber bands if used․
Letting the Dye Set for Optimal Color Intensity
Allow the dye to set for 6-8 hours or longer to achieve the most vibrant colors․ This waiting period ensures the dye penetrates deeply into the fabric‚ resulting in rich‚ long-lasting hues․ Keep the fabric folded and undisturbed during this time to prevent color bleeding or uneven distribution․ The longer it sets‚ the more intense the final colors will be‚ making your tie-dye project truly stand out․
Rinsing the Fabric After Dyeing
Rinse the fabric thoroughly with cold water until excess dye is removed․ Cut rubber bands if used‚ then continue rinsing to ensure all loose dye is washed away․ This step prevents color bleeding and fading․ Gently massage the fabric under running water to release remaining dye residue․ Rinse until the water runs clear‚ ensuring vibrant‚ long-lasting colors․ Proper rinsing is essential before washing to maintain the intensity of the tie-dye design․
Washing and Drying Instructions
Wash the dyed fabric separately in hot water with a small amount of laundry detergent․ Dry on a low heat setting to preserve vibrant colors and prevent fading․
First Wash After Tie-Dye
After allowing the dye to set for 6-8 hours‚ rinse the fabric gently with cold water to remove excess dye․ Once rinsed‚ wash the fabric in a washing machine using hot water and a mild detergent․ This initial wash helps remove any remaining dye residue‚ ensuring the colors stay vibrant․ It’s important to wash the dyed fabric separately from other clothes to prevent any color transfer․ Proper washing ensures long-lasting‚ professional-looking results․
Drying the Fabric to Preserve Colors
After the first wash‚ gently remove excess water without wringing the fabric․ For best results‚ dry on a low heat setting in a dryer or air dry away from direct sunlight․ High heat can cause colors to fade‚ so low heat is recommended․ To preserve vibrant colors‚ avoid exposure to direct sunlight during drying․ Proper drying ensures the fabric retains its softness and color intensity․ Follow these steps to maintain the quality and appearance of your tie-dye project․

Safety Tips and Precautions
Wear protective gloves and old clothes to avoid skin and fabric stains․ Work in a well-ventilated area to prevent inhaling dye fumes․ Keep dye away from skin and surfaces to avoid accidental stains․ Follow instructions carefully to ensure a safe and successful tie-dye experience․ Always prioritize safety while handling dye materials․
Handling Dye Safely
When handling Tulip tie-dye‚ always wear protective gloves to prevent skin irritation․ Ensure good ventilation to avoid inhaling dye particles․ Avoid ingestion of dye and keep it out of reach of children․ If dye comes into contact with skin‚ wash immediately with soap and water․ Regularly clean tools and surfaces to prevent staining․ Follow the instructions precisely to maintain safety and achieve the best results․ Safe handling ensures a enjoyable and hazard-free tie-dye experience․ Always prioritize caution when working with any dye products․
Protecting Skin and Surfaces from Stains
Protect your skin by wearing gloves when mixing or applying dye․ Cover work surfaces with plastic or newspaper to prevent staining․ Old clothes or aprons can shield your clothing from accidental splatters․ Immediately clean any spills with water to avoid permanent marks․ For stubborn stains‚ use a stain remover before washing․ Regularly wash hands and tools to maintain a clean workspace․ These precautions ensure a mess-free and enjoyable tie-dye experience while preserving your surroundings and skin from dye damage․

Troubleshooting Common Issues
Address color fading by following instructions precisely․ Fix uneven distribution by ensuring proper dye saturation․ Prevent washout by allowing dye to set fully before rinsing․
Fixing Uneven Color Distribution
Uneven color distribution can occur due to insufficient dye saturation or improper folding techniques․ To fix this‚ ensure the dye is evenly applied and the fabric is fully saturated․ Gently agitate the fabric or reapply dye to lighter areas․ Allowing the dye to set longer can also help intensify colors․ For severe cases‚ re-dyeing the fabric following the instructions carefully may be necessary to achieve a more balanced look․
Addressing Fading or Washout Issues
Fading or washout can occur if instructions aren’t followed‚ such as using insufficient dye or not letting it set long enough․ To prevent this‚ ensure proper dye saturation and allow the fabric to set for 6-8 hours․ Wash in cold water and avoid using bleach․ For already faded designs‚ reapplying dye following the kit’s instructions can restore vibrancy․ Always follow care labels to maintain color intensity and enjoy long-lasting results with your Tulip Tie-Dye creations․

Advanced Techniques for Experienced Crafters
Explore advanced techniques like layering colors or combining methods for unique patterns․ Mix dyes creatively and follow instructions for intense‚ long-lasting results․
Combining Tie-Dye with Other Crafts
Enhance your tie-dye projects by incorporating other crafts‚ like embroidery or appliqué‚ for unique designs․ Experiment with layering colors and folding techniques to create intricate patterns․ Follow the Tulip Tie-Dye instructions for mixing dyes and setting colors‚ then integrate these methods into sewing‚ quilting‚ or upcycling projects․ This approach allows you to create one-of-a-kind pieces‚ from vibrant clothing to decorative home items‚ while maintaining the vibrant‚ long-lasting results of Tulip dyes․
Creating Unique Patterns with Special Effects
Elevate your tie-dye artistry by experimenting with special effects like ombre‚ marbling‚ or shibori․ Fold fabric into accordion pleats or use resist techniques to achieve dynamic designs․ According to Tulip Tie-Dye instructions‚ mix dyes in unique ratios for gradient effects․ Layer colors strategically to create multi-tone hues․ For marbling‚ gently manipulative dye on fabric surfaces․ These methods ensure each piece is distinct‚ offering endless creativity while maintaining Tulip’s vibrant‚ wash-fast colors for professional-quality results every time․
With Tulip Tie-Dye‚ unlock creativity and achieve stunning results․ Follow instructions carefully‚ experiment with techniques‚ and enjoy vibrant‚ long-lasting colors․ Happy crafting!
Final Tips for Achieving Professional Results
For vibrant‚ long-lasting colors‚ always follow Tulip Tie-Dye instructions carefully․ Allow dye to set for 6-8 hours for intense results․ Protect workspaces with paper or plastic․ Use gloves to avoid skin staining․ Wash projects separately after dyeing to prevent color bleeding․ Heat-setting colors in a dryer can enhance durability․ Experiment with folding techniques and color combinations for unique designs․ Practice makes perfect—enjoy the creative process and share your vibrant creations with pride!
Encouragement to Experiment and Create
Dive into the creative world of tie-dye with Tulip kits! Don’t be afraid to try new folding techniques or mix colors for unique effects․ Every project is a chance to explore and innovate․ Share your vibrant creations with friends and family‚ and enjoy the satisfaction of wearing or gifting your handmade designs․ Let your imagination run wild and make every piece a one-of-a-kind masterpiece with Tulip Tie-Dye!